Click the image for larger view. |
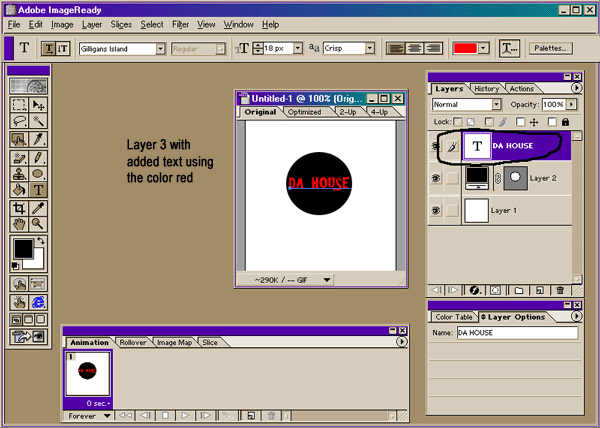
Again let's take a look at the
ImageReady workspace, but this time with an image file already open.
You'll see the tools palette, or toolbox, on the left, the animation
palette at the bottom of the window, the layers option box to the right
of that, and above right you'll find that all-important layers
palette. Get to know this puppy, cuz you're going to use it ALL the
time, especially when creating animations.
|
|
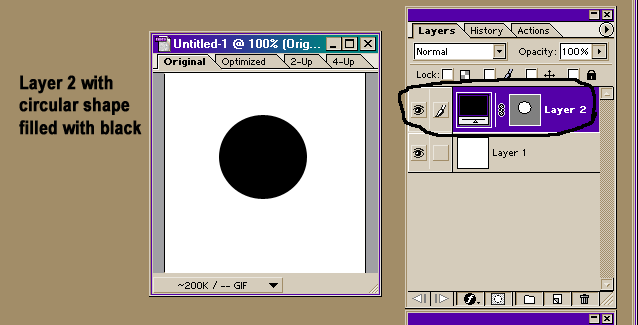
Each newly created image starts with single layer called the background layer. Think of this first layer as the base layer of a painting. It's from that base that all other changes, colors, painting and/or editing will be applied. You cannot change the position of the background layer in the stacking order (it is always at the bottom); nor can you apply a blending mode or opacity to a background layer (unless you first convert it to a normal layer). Layers are great in that they allow you to make changes to an image without altering the original. For example, say you began a new image and filled it (the background layer) with color. You could then add a new layer, to which you could paste another image or perhaps create a custom shape. Next you could click on the text tool on the tools palette and add some colored text to your image. VOILA! Instant web button.
Think of layers as sheets of very thin, transparent paper stacked one on top of the other. Where there is no image on a layer (that is, in places where the layer is transparent), you can see through to the layers below. All layers in a file have the same resolution, start with the same number of channels, and have the same image mode, either RGB, CMYK, or Grayscale. You can draw, edit, paste, and reposition elements on one layer without disturbing the others. Until you combine, or merge, the layers, each layer remains independent of the others in the image. This means you can experiment freely with graphics, type, opacities, and blending modes, special effects and filters.
Both Photoshop and ImageReady support normal layers and text layers. Additionally, Photoshop supports adjustment and fill layers. You can apply sophisticated effects to layers using masks, layer clipping paths, and layer styles. In ImageReady, you can also use layers to create rollover states and animations.
One of the most enjoyable aspects about working with graphics is playing with text. And both PhotoShop and ImageReady have the capability of adding all sorts of neat effects, filters, blurs, motions, twists, arches, bells and whistles. Well, maybe not bells and whistles, but certainly everything else. *g*
Once you've selected the proper layer on which to apply your chosen effect, simply click the LAYER button on the main toolbar at the top of the program window. This opens the LAYER STYLE options dialogue box. From here you can choose an assortment of special effects, such as bevel-emboss, drop shadow, inner glow, outer glow, and so on. Playing around with all the different effects will give you a "feel" for what type of effect goes best with specific images and different types of fonts.
NOTE: In the screen shot above you'll also see references to font style/name, font size, font color, and text position.
|
|
| Back to beginning of tutorials... | Continued on next page... |